
周而复始(母子)
豆豆豆
小时候,妈妈拉我的手。长大后,我拉妈妈的手。“爱情的试错需要勇气,你没有勇气迈出的每一步,都由我来完成”1v2,男c女f,包含亲母子。隔壁连载文《缠枝》n预收《请你为我降临》n娱乐圈女金主
书连小说网 · www.senvang.org
豆豆豆
小时候,妈妈拉我的手。长大后,我拉妈妈的手。“爱情的试错需要勇气,你没有勇气迈出的每一步,都由我来完成”1v2,男c女f,包含亲母子。隔壁连载文《缠枝》n预收《请你为我降临》n娱乐圈女金主
夜沙灯
心月狐遇见魔尊时已经很晚了。他过尽千帆,屠龙少年终成恶龙。魔尊以为她是自己浪子回头的终点。却不知自己是她夫君遍天下的起点。这一生不是太早,就是太迟。s:白月光是心月狐。一句话简介:男频挂逼赵日天和女频恋爱脑苏玛丽之间的跨服作战。一个我们大家都知道结局的故事。首-发:(o1i)

如如是阿如
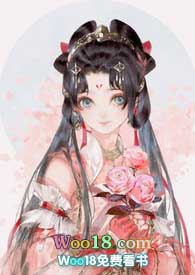
袁如活了17年才第一次正式跟自己的二叔叔见面。当晚他俩就躺在了一张床上,男人极其嫌弃她睡姿丑。没过几天,她的零花钱从仅有的一千元增至到了200;从住校变成走读;从不知道自己下体长什么样到被人扒开腿一点点给她科普;从对长辈的喜欢变成对男人的爱慕……她真的以为自己冲破世俗得到的幸福是真的幸福,直到某天她站在了二叔叔和其他女人的婚礼现场……她想逃,男人却扔给她把枪,说:“杀了我,你就能走。”纯情小白兔被
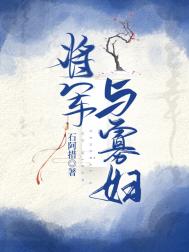
石阿措
兰姑是村里最俊俏的女人,白白净净,身段姣好,可惜是个寡妇,身后还跟着个拖油瓶。村里的单身汉子暗暗觊觎兰姑,没事就爱在她门前晃悠。所谓寡妇门前是非多,兰姑虽然洁身自好,却免不了被人嚼舌根子,..
Lucinia
vv点018点m和钟杭弋交换身体之后,看着我自己这张娇美的小脸,彼时我正穿着一条黑色天鹅绒的吊带裙,粉白而腻滑的皮肤露了大片在外面,他似娇似嗔地白了我一眼,我登时明显地感觉到自己的下身起了反应。我就不明白了,我这么美丽的女大学生,他怎么就不喜欢我呢?

贝贝奶茶
作为快穿局的优秀老员工,安程迎来自己的最后一个任务,完成即可重生并享有上亿资产。任务是这样的:在某棠的一本小说中,主角受白卿容貌俊美还成绩优异,许多男人费劲心机只为得到他。主角受本想反..

阿舟
zàшц.z()传闻大成王朝四公主喻幼清面容娇美,性子温吞,柔弱难自理。一朝阴谋赐婚,嫁于战神将军,京城中有名的顽劣子弟盛舒怀成了她的后儿。新婚之夜,这人躲进新房将她逼入墙角,勾起发丝调戏,从此结下梁子。看似单纯的四公主在继子眼前毫